
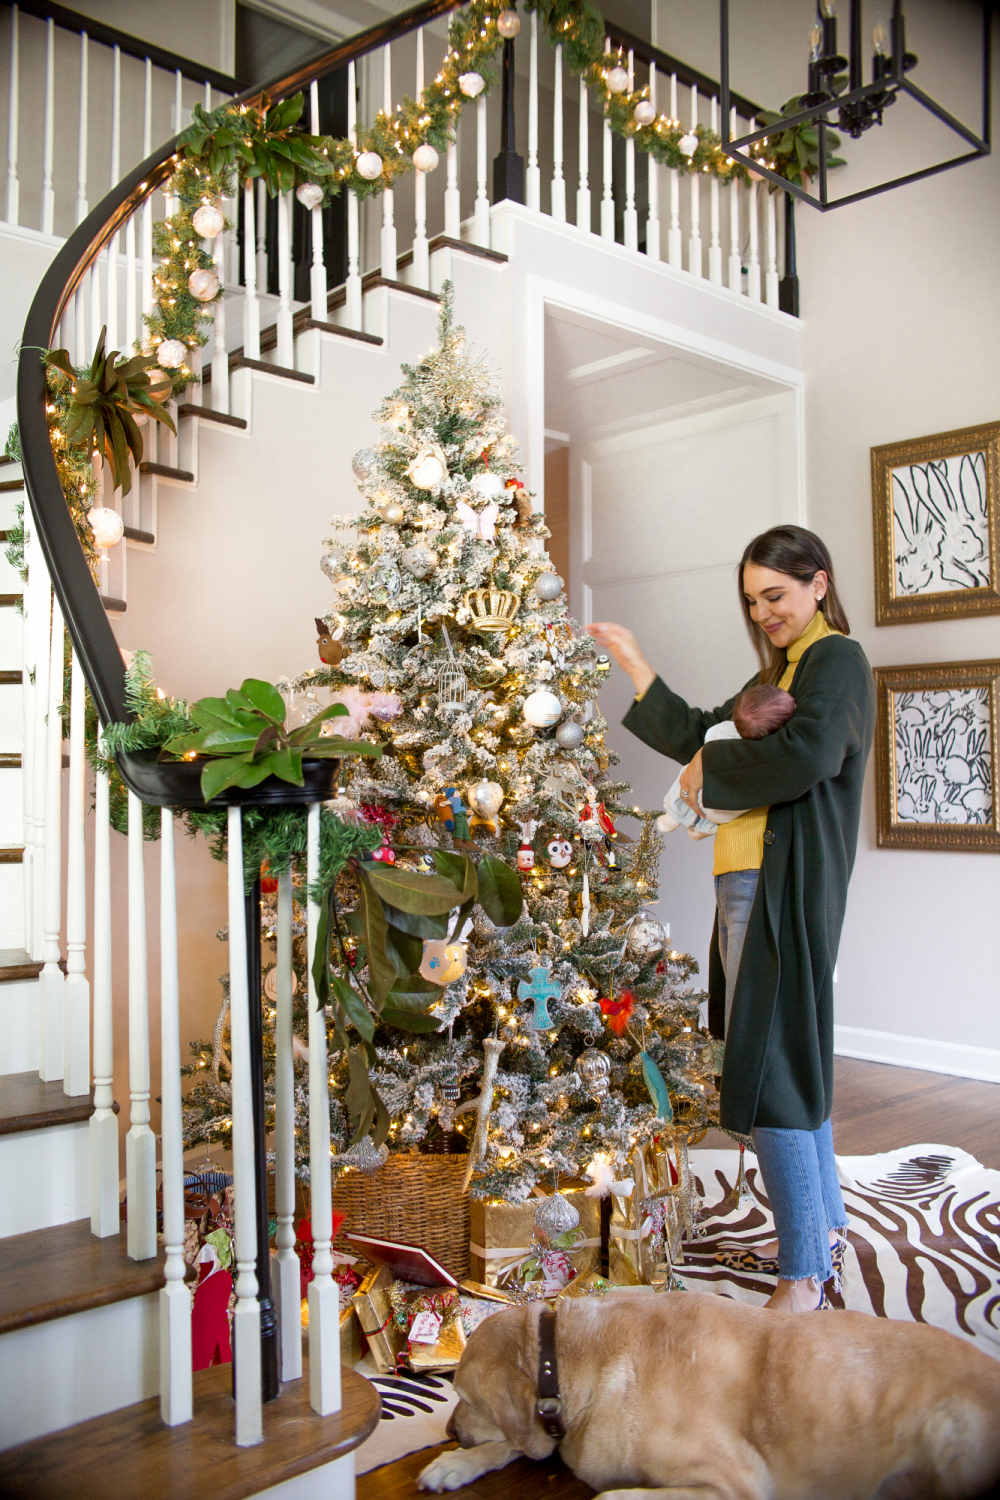
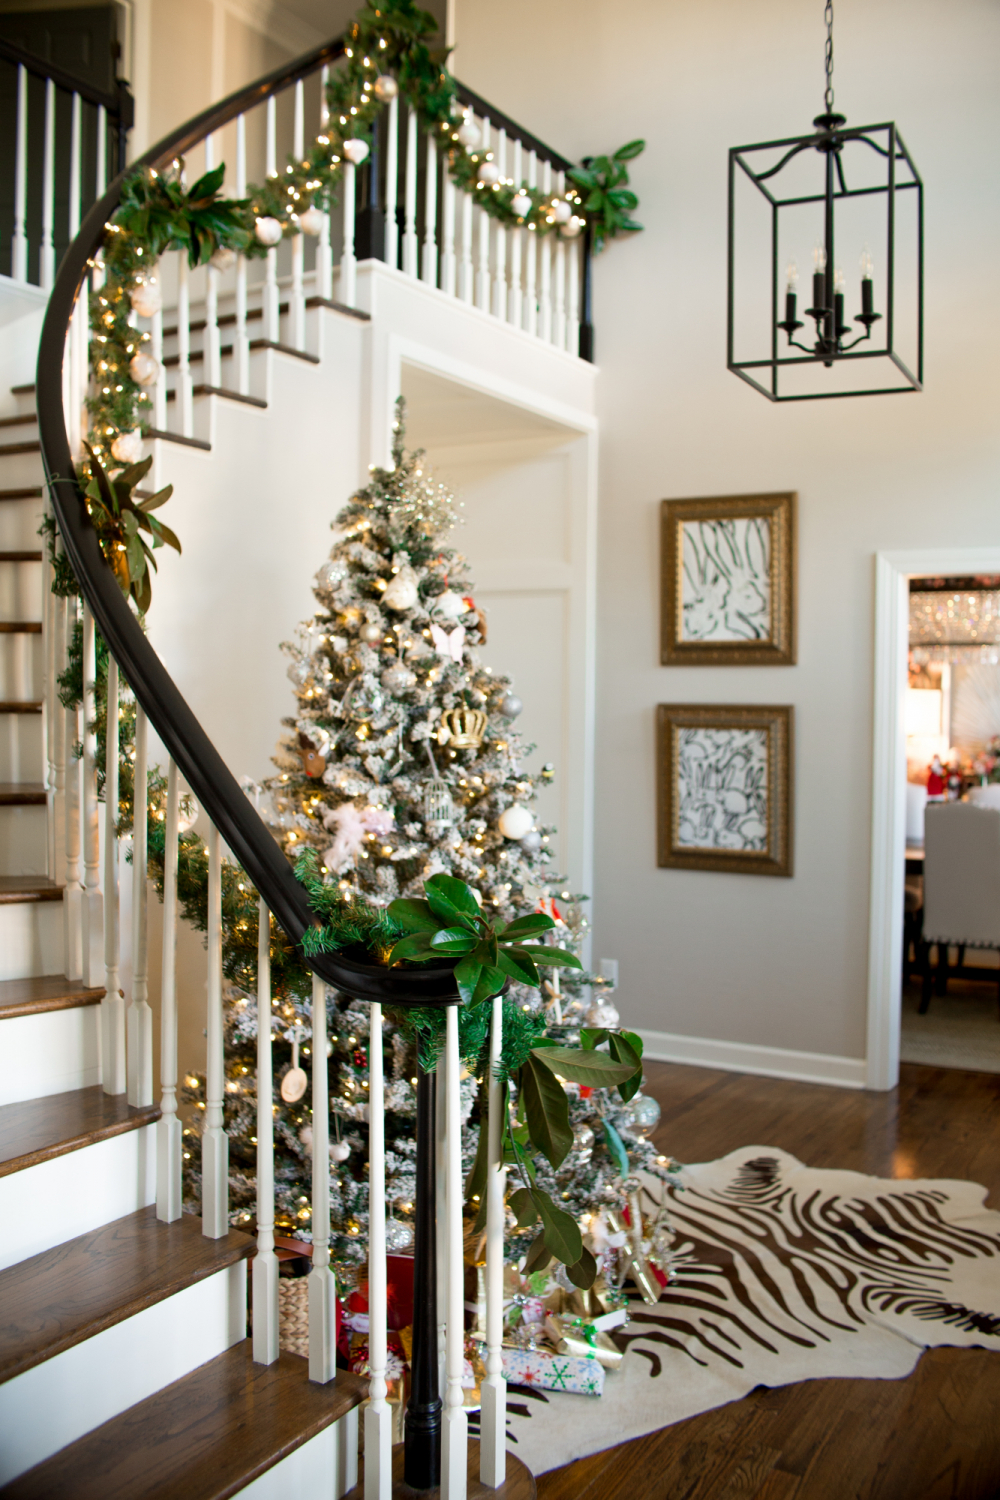
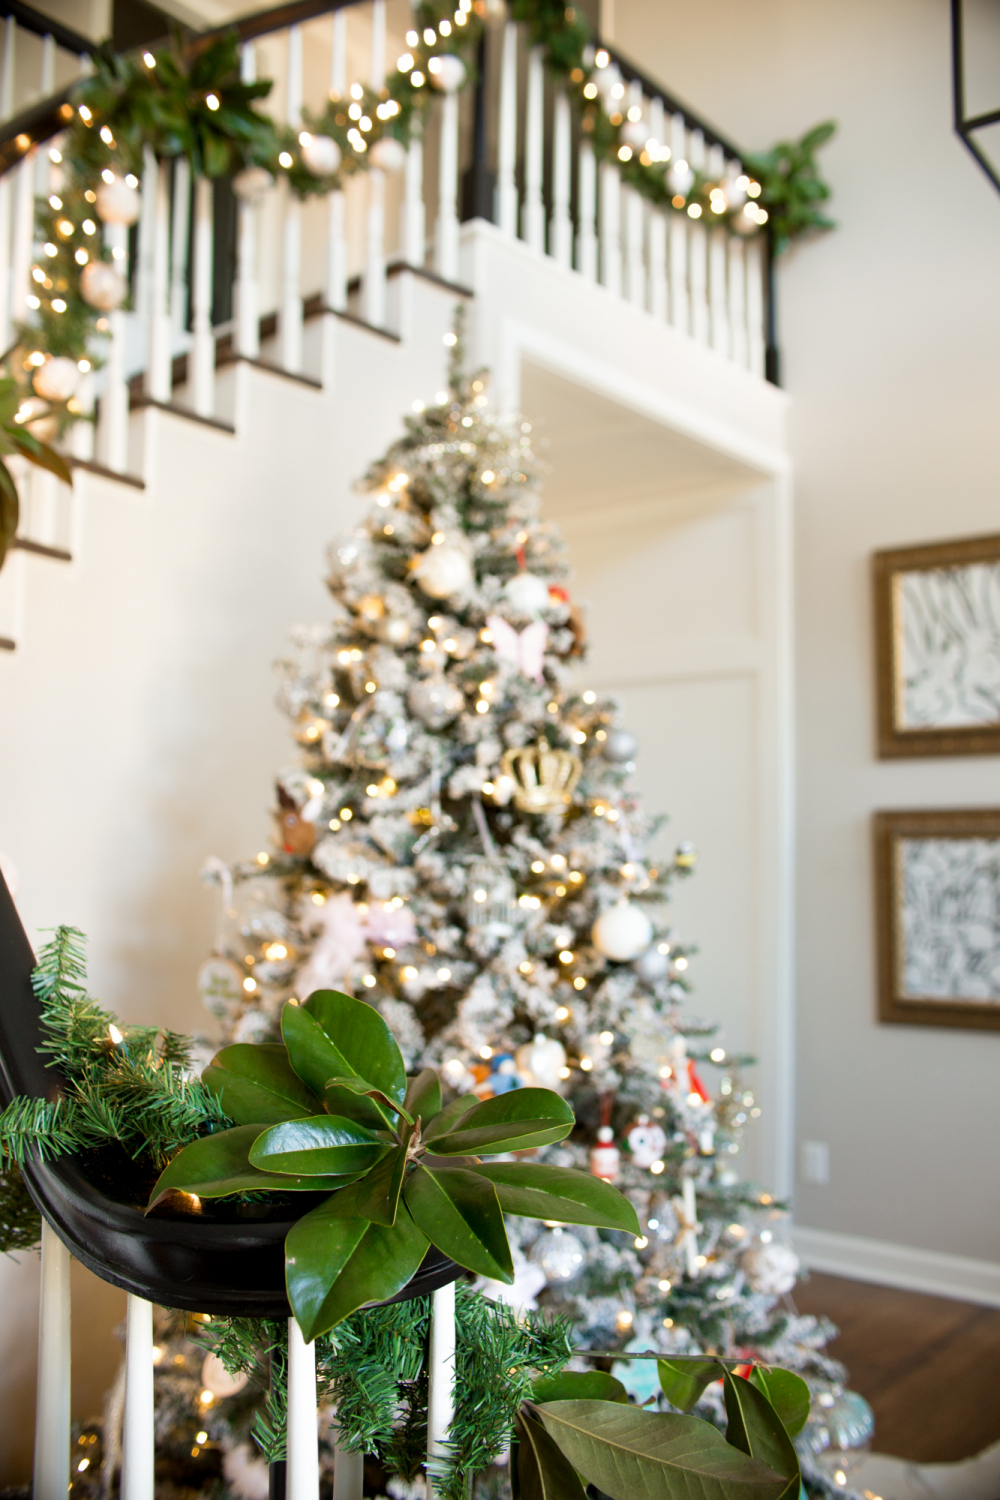
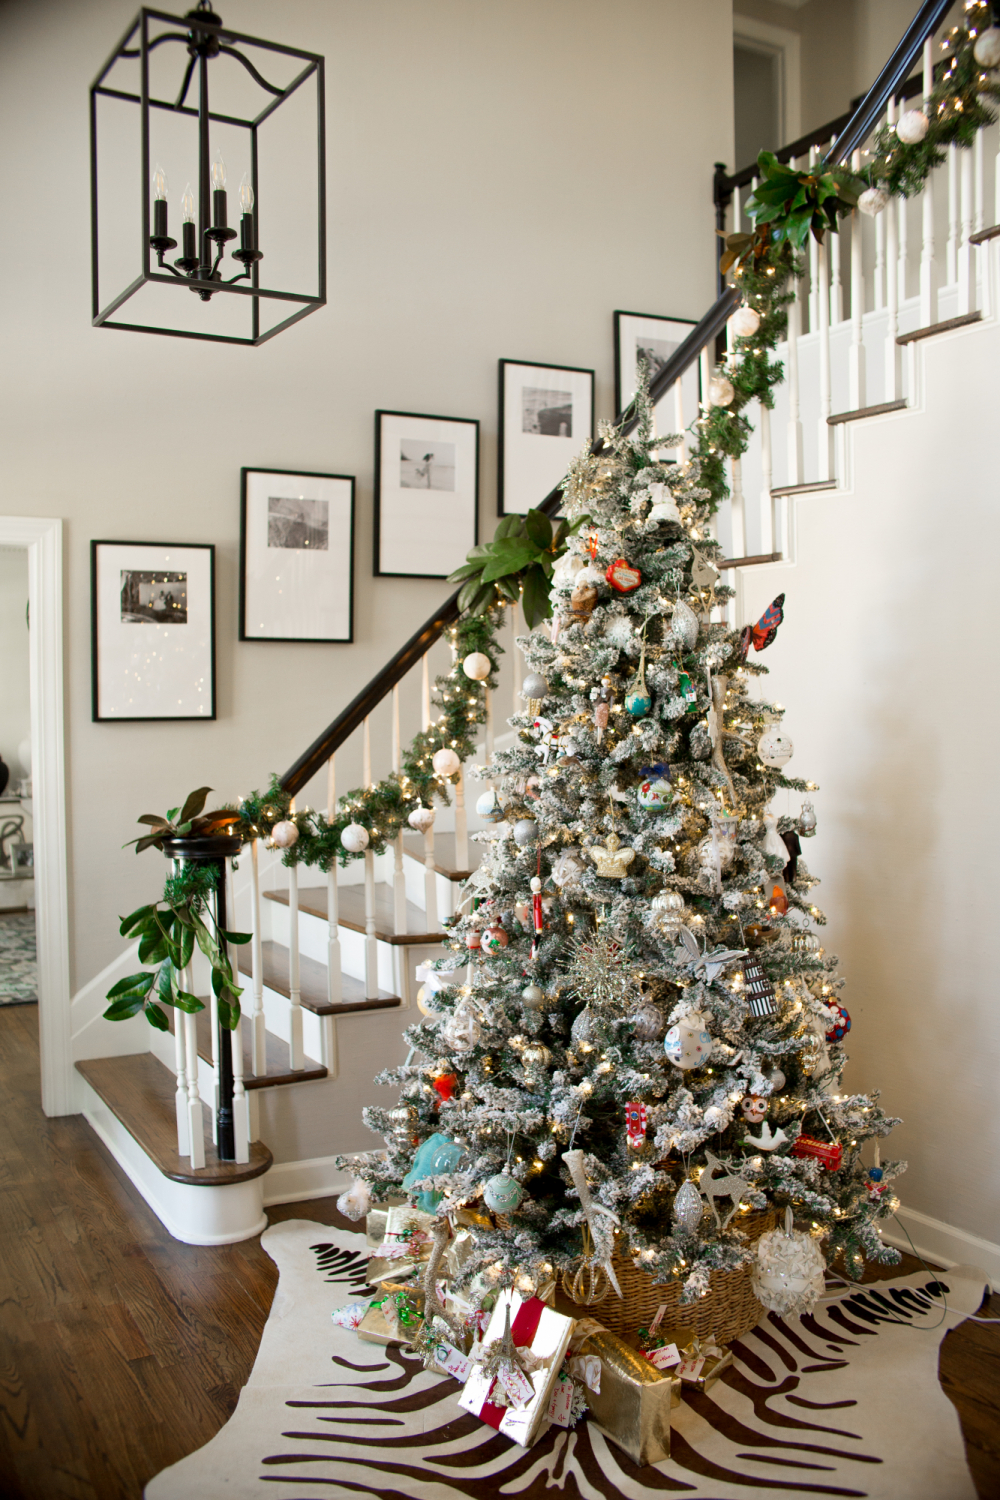
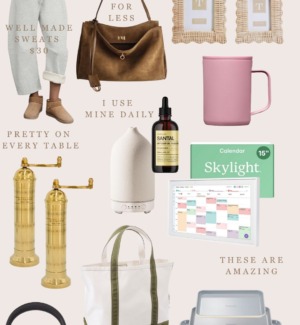
rug c/o Summerhouse, similar one here | light fixture c/o Craftmade | tree (on sale) | similar tree basket (on sale) | garland | frames c/o Framebridge | white ornaments
When my parents came to visit and meet Hudson, my dad had just gotten over a cold and in the process had given it to my mom. Since they couldn’t hold or do much with Hudson, they instantly turned our home into an HGTV episode. They fully decked it out for the holidays, as well as helped with numerous small household projects. There’s no way I would have gotten all of these decorations up without them!
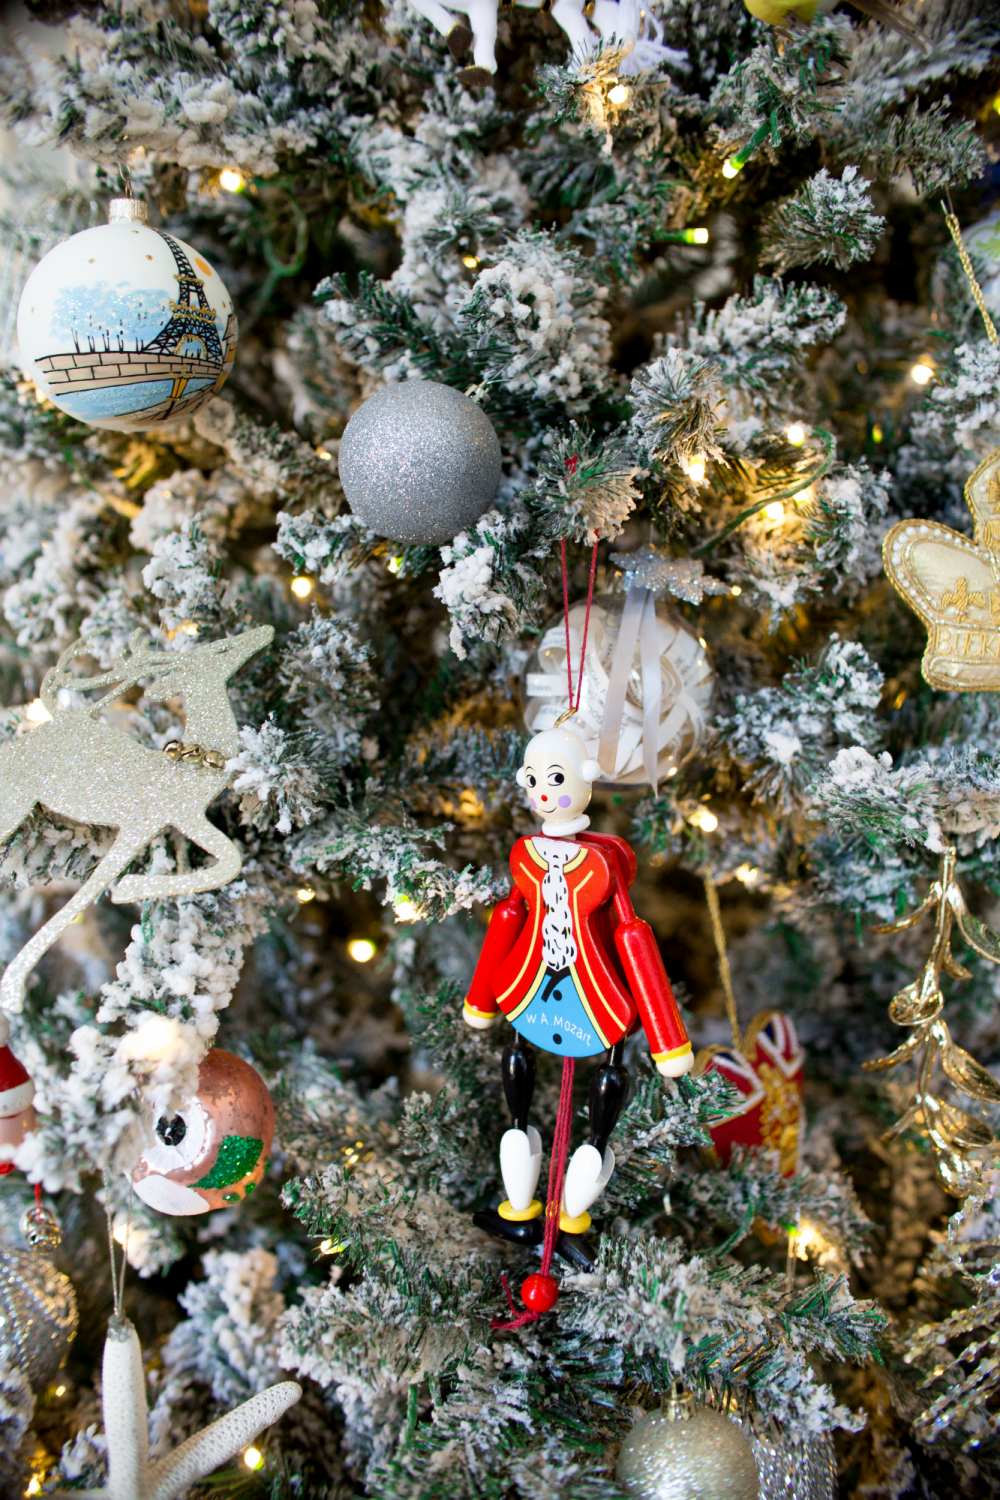
I had wanted to get a ten or twelve foot tree for our foyer… but with a newborn, I just wasn’t able to make it happen this year. So we are using our flocked tree from years past, and it never disappoints!
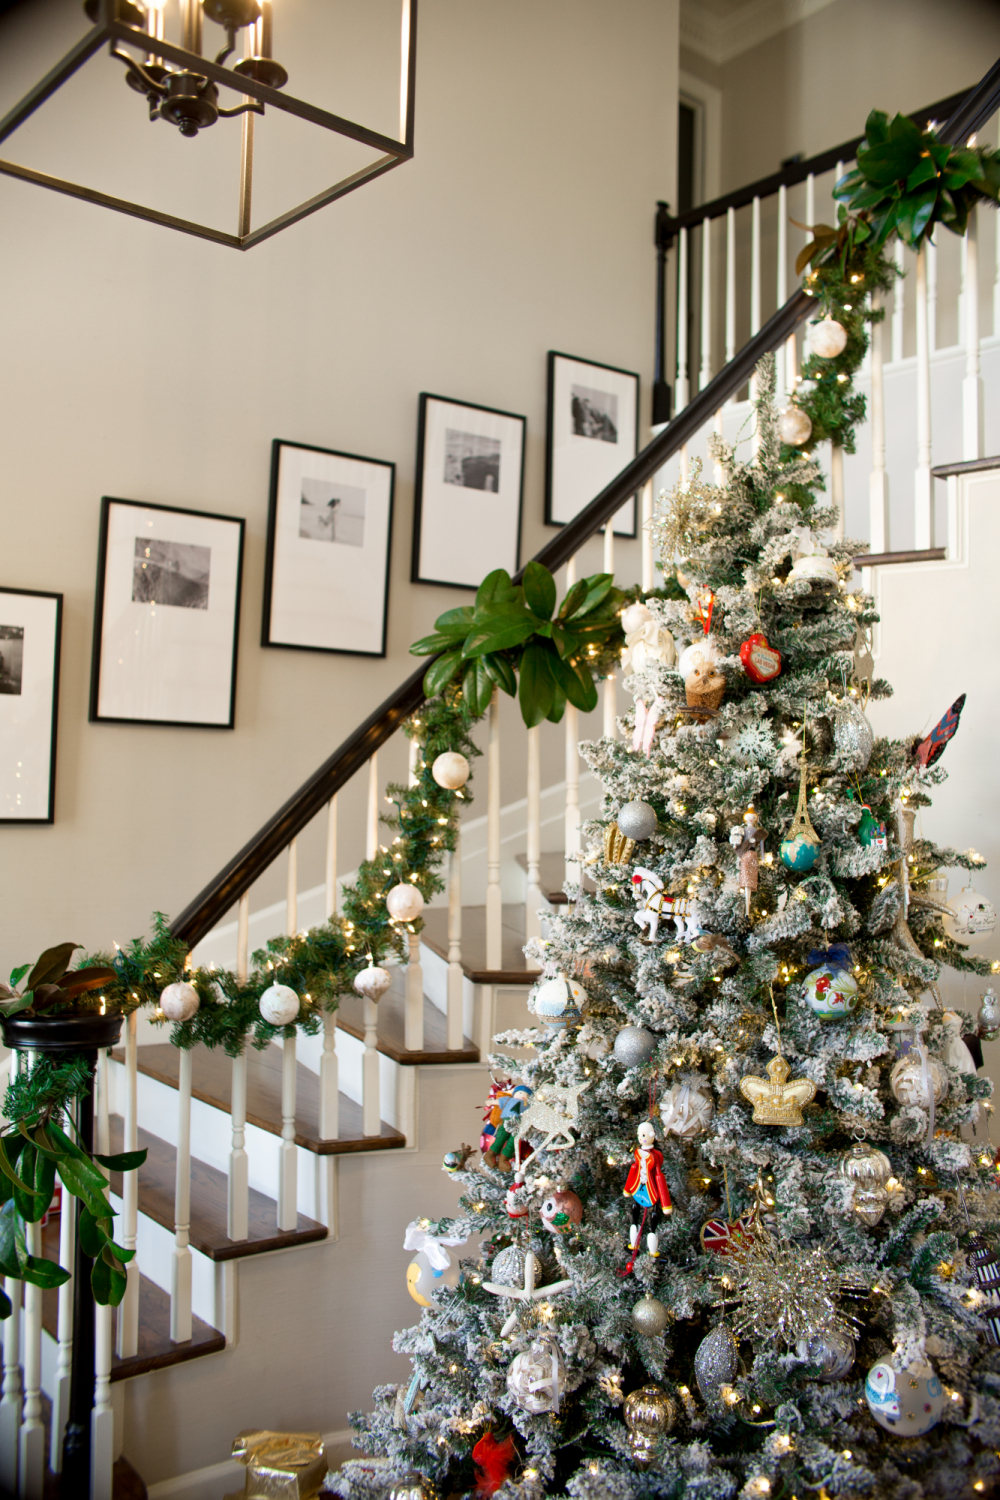
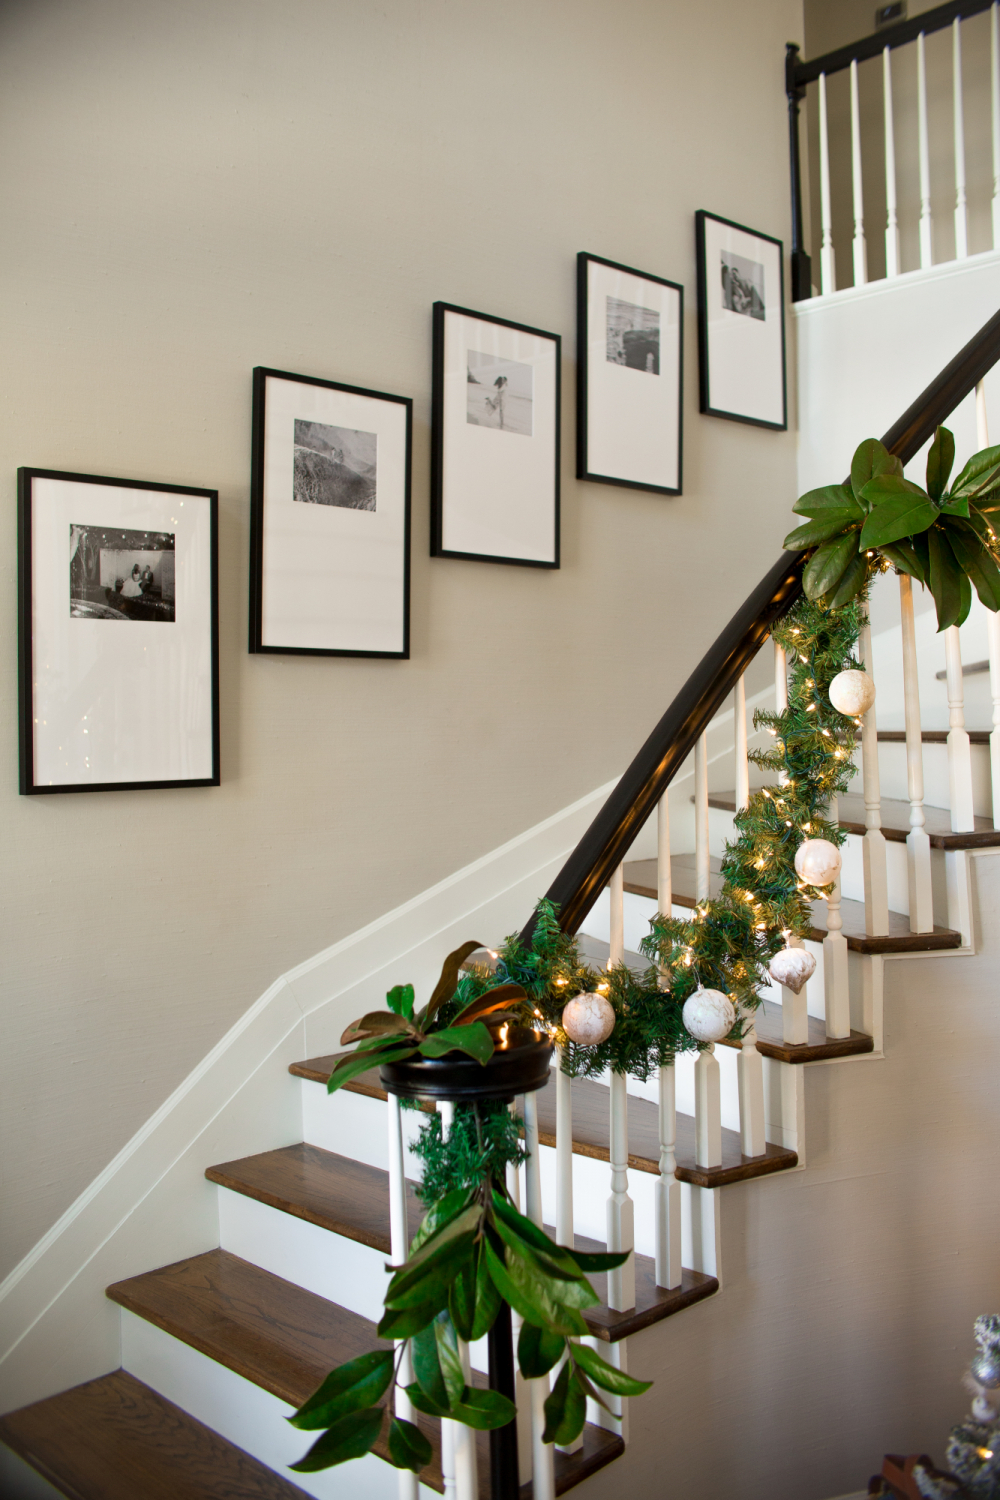
I documented some of their masterpiece on Instagram, and was floored by the amount of questions about the magnolia garland! So much so that I wanted to share how they made it all come together in a blog post that would be easily searchable for the future.
It’s so easy that it’s borderline embarrassing, but we are going to break it down step by step so you can create this at home! Directions are at the bottom of this post!


Magnolia Garland DIY
You’ll need:
Garland of your choice
Magnolia leaves + stems – we have trees in our backyard, so finding a friend/neighbor who will share will largely cut down on cost!
Directions:
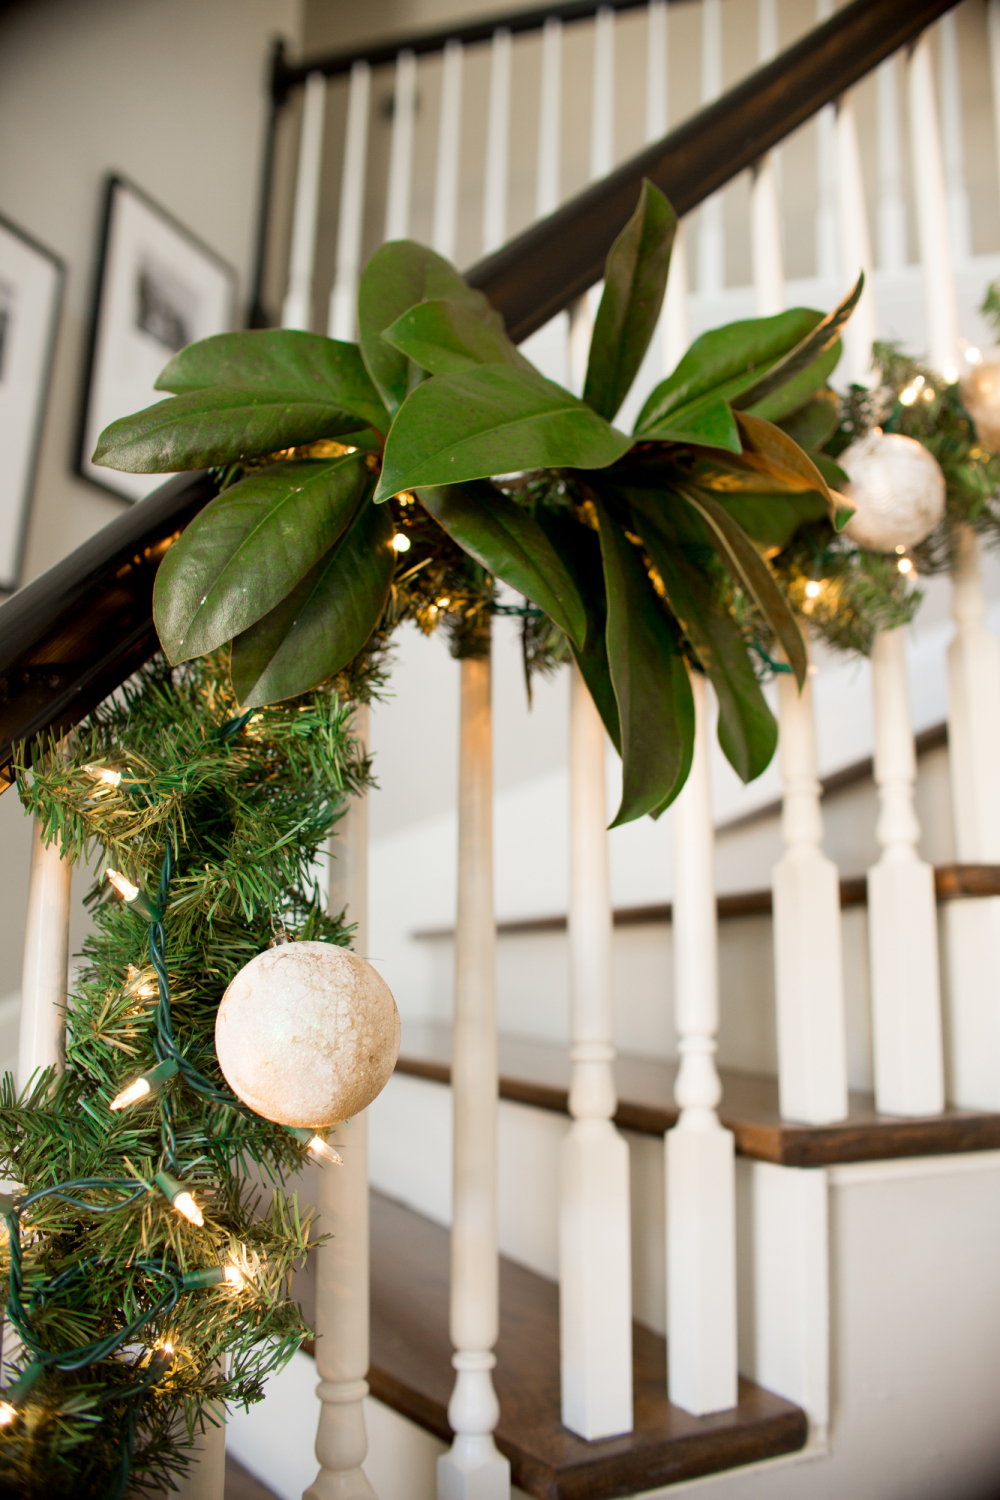
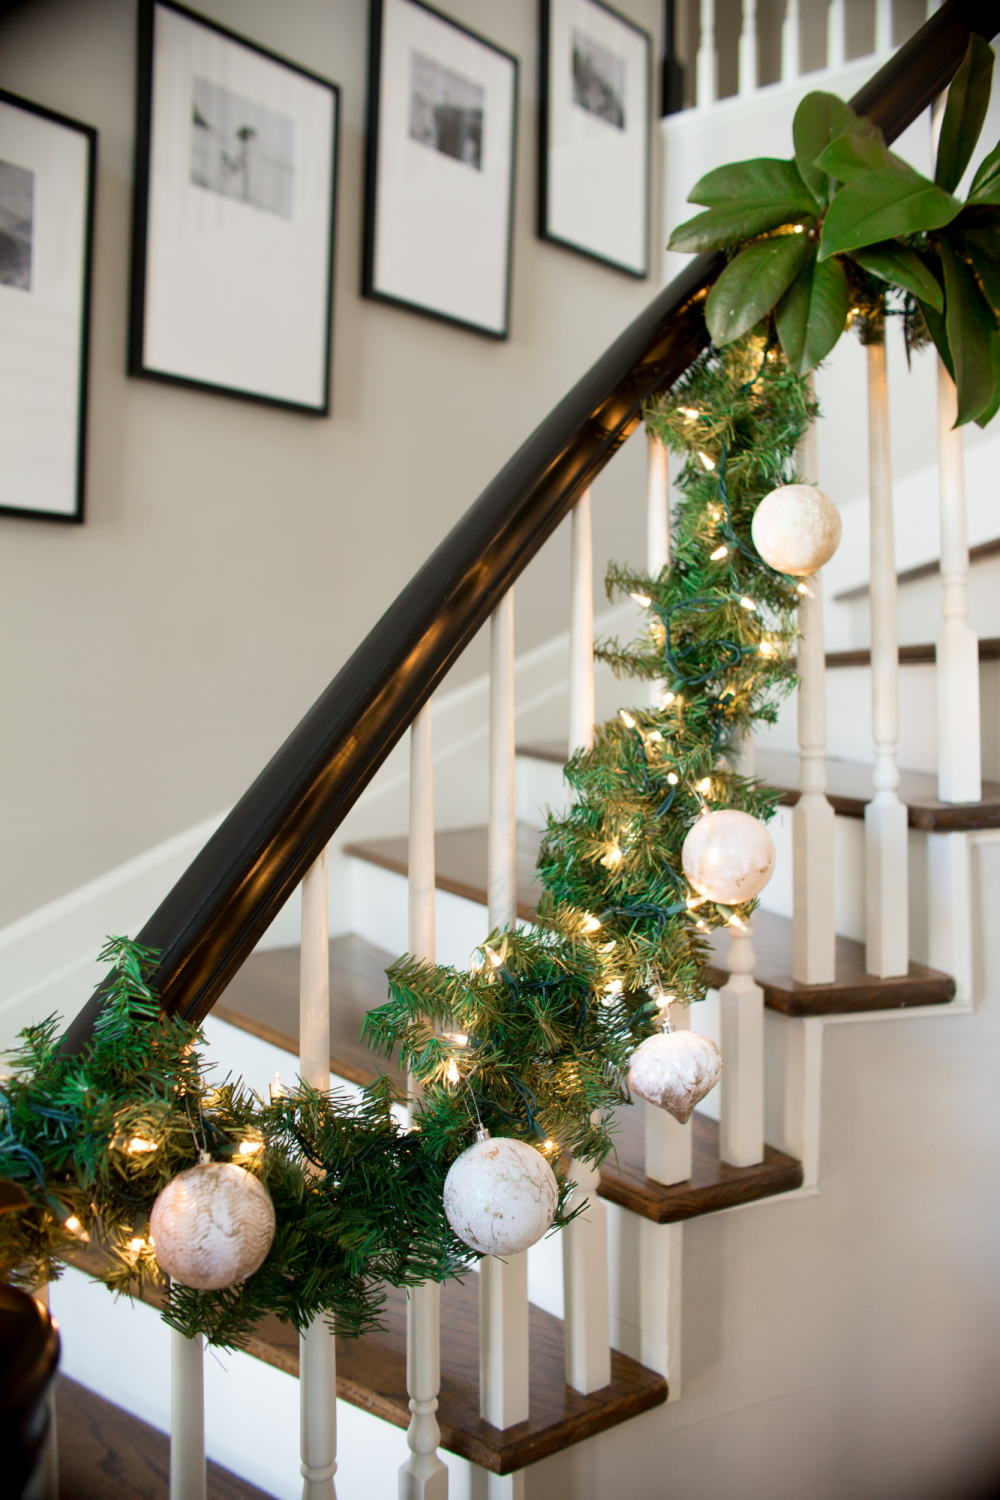
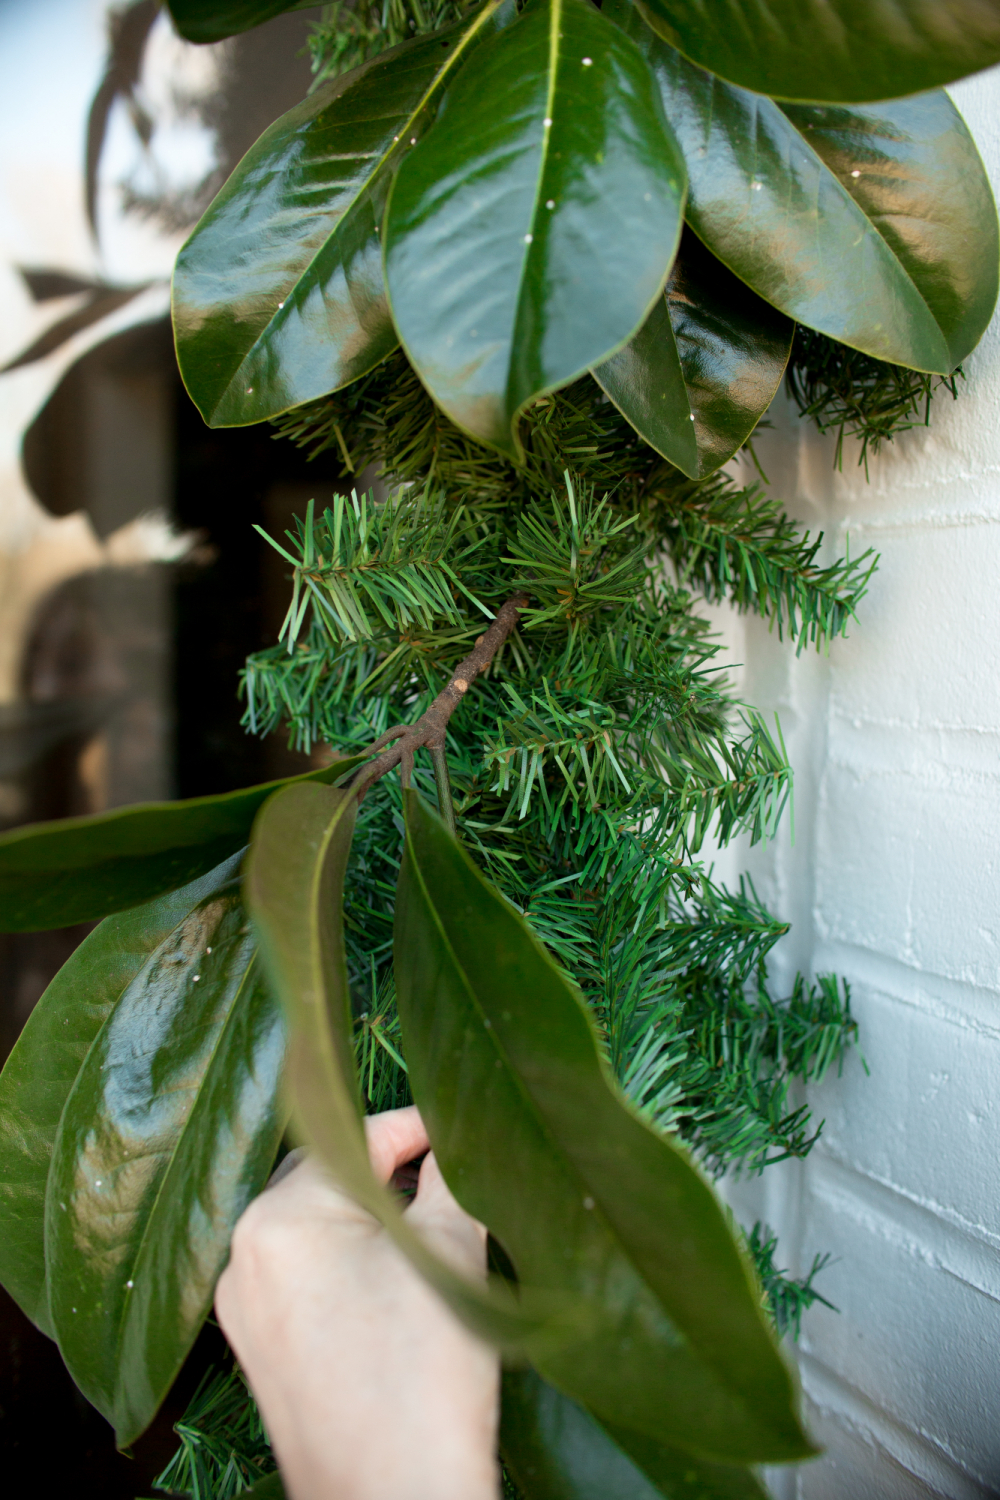
When it comes to your garland, buy the kind that has the tiny wire branches that you can bend. The garland we used is a combination from At Home and Wal-Mart. We bought several 9-foot strands.
If your strands aren’t thick enough, you can double or even triple it. Make your garland thicker by placing them side by side and twisting the branches around each other.
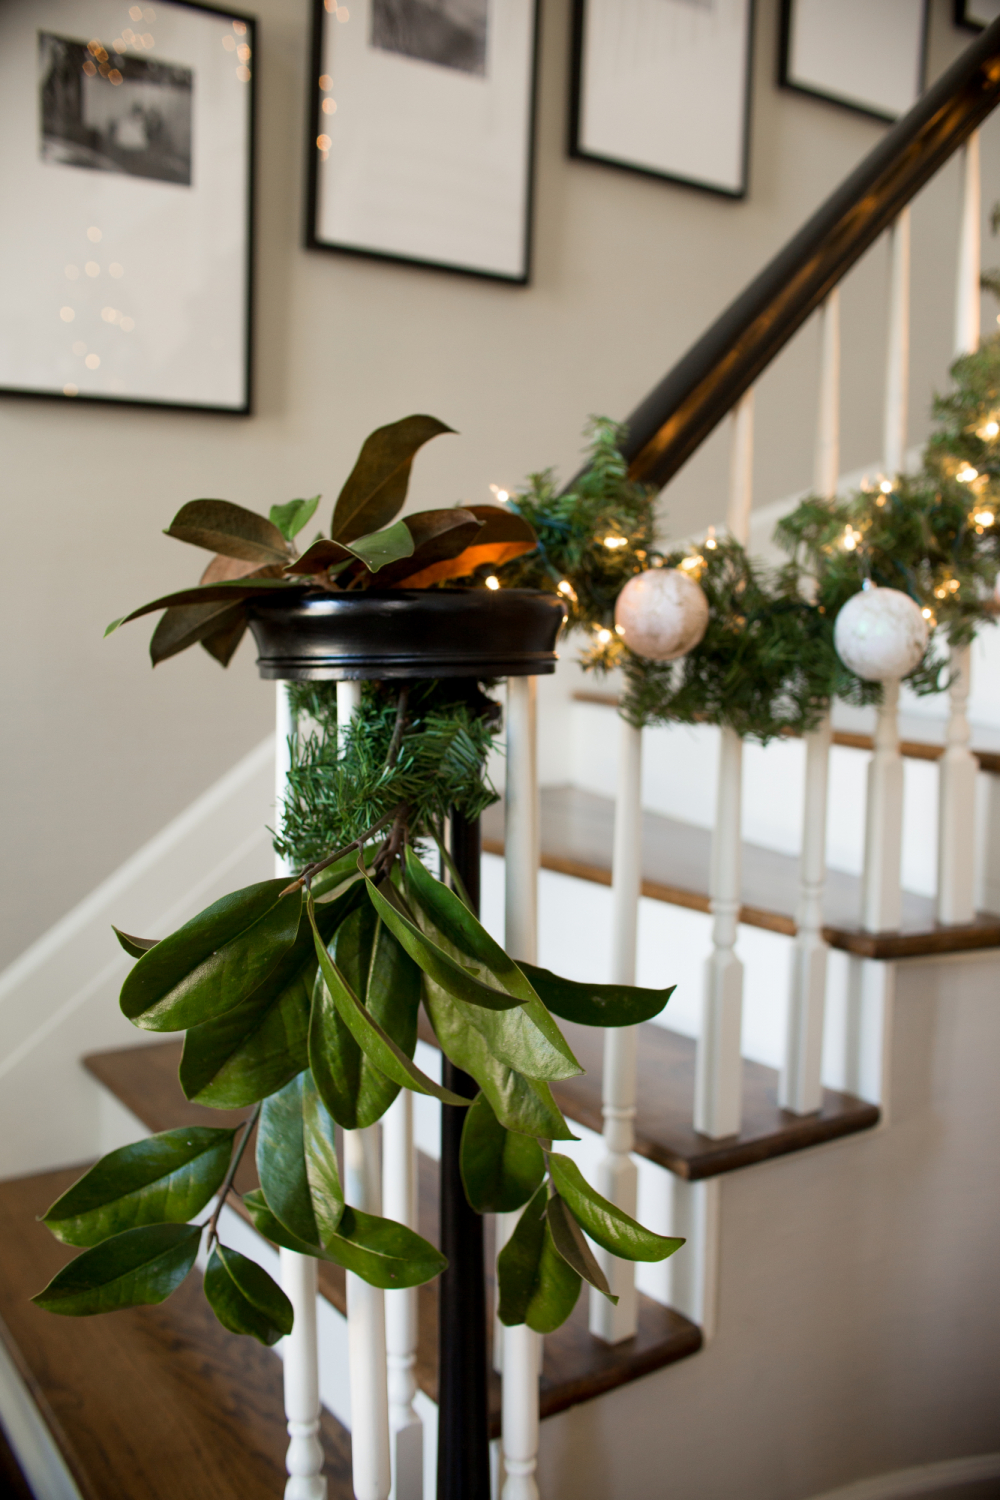
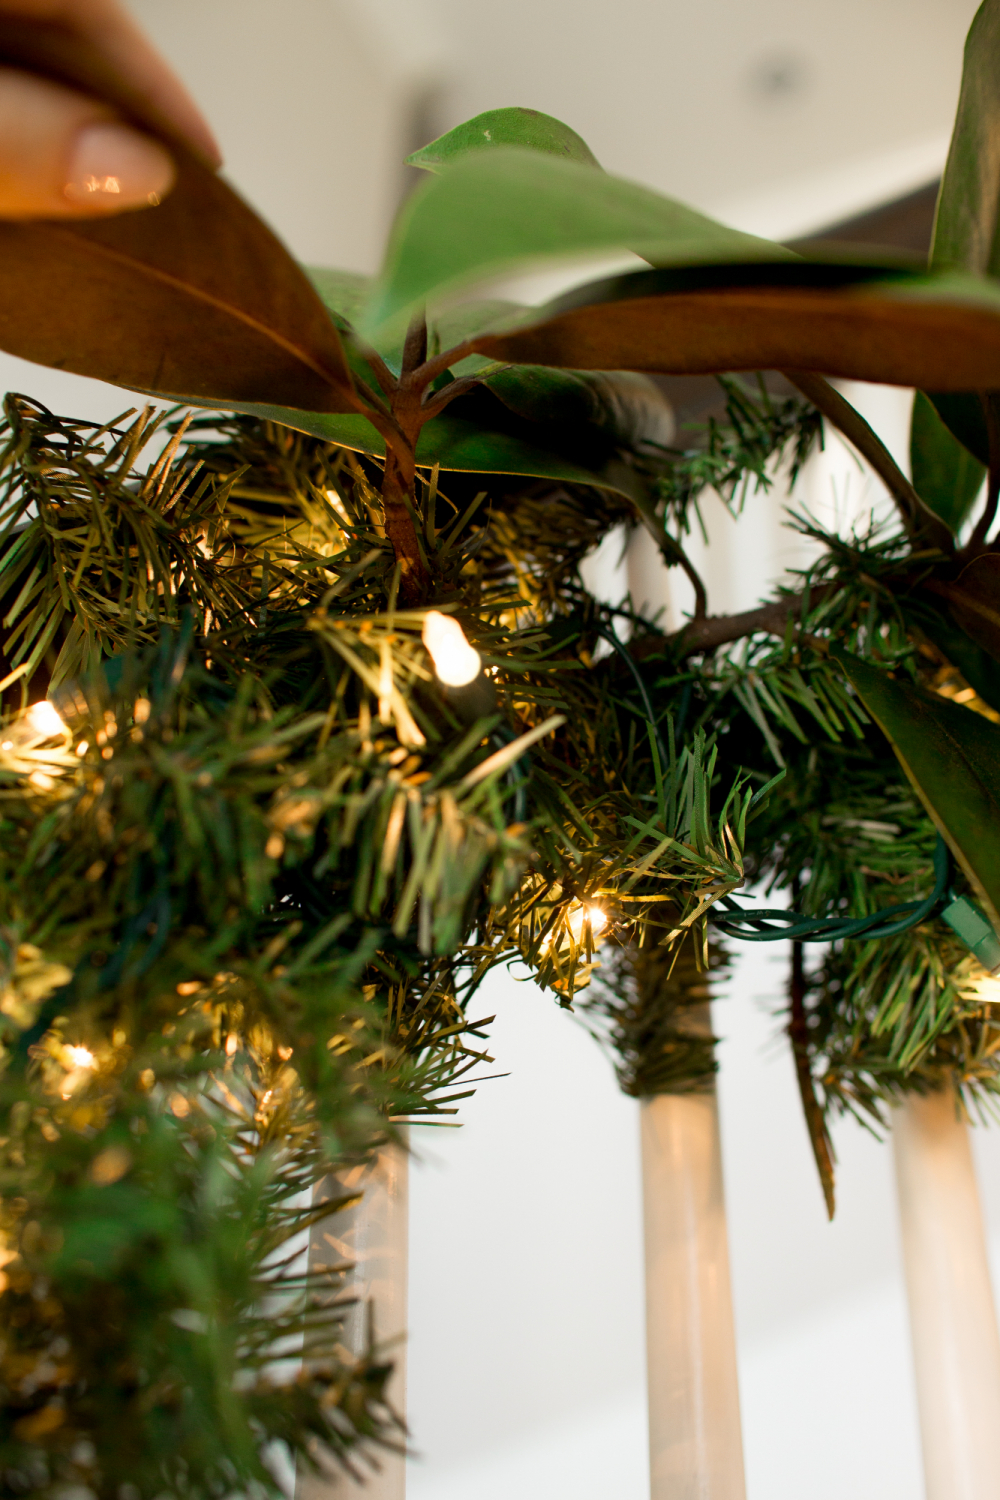
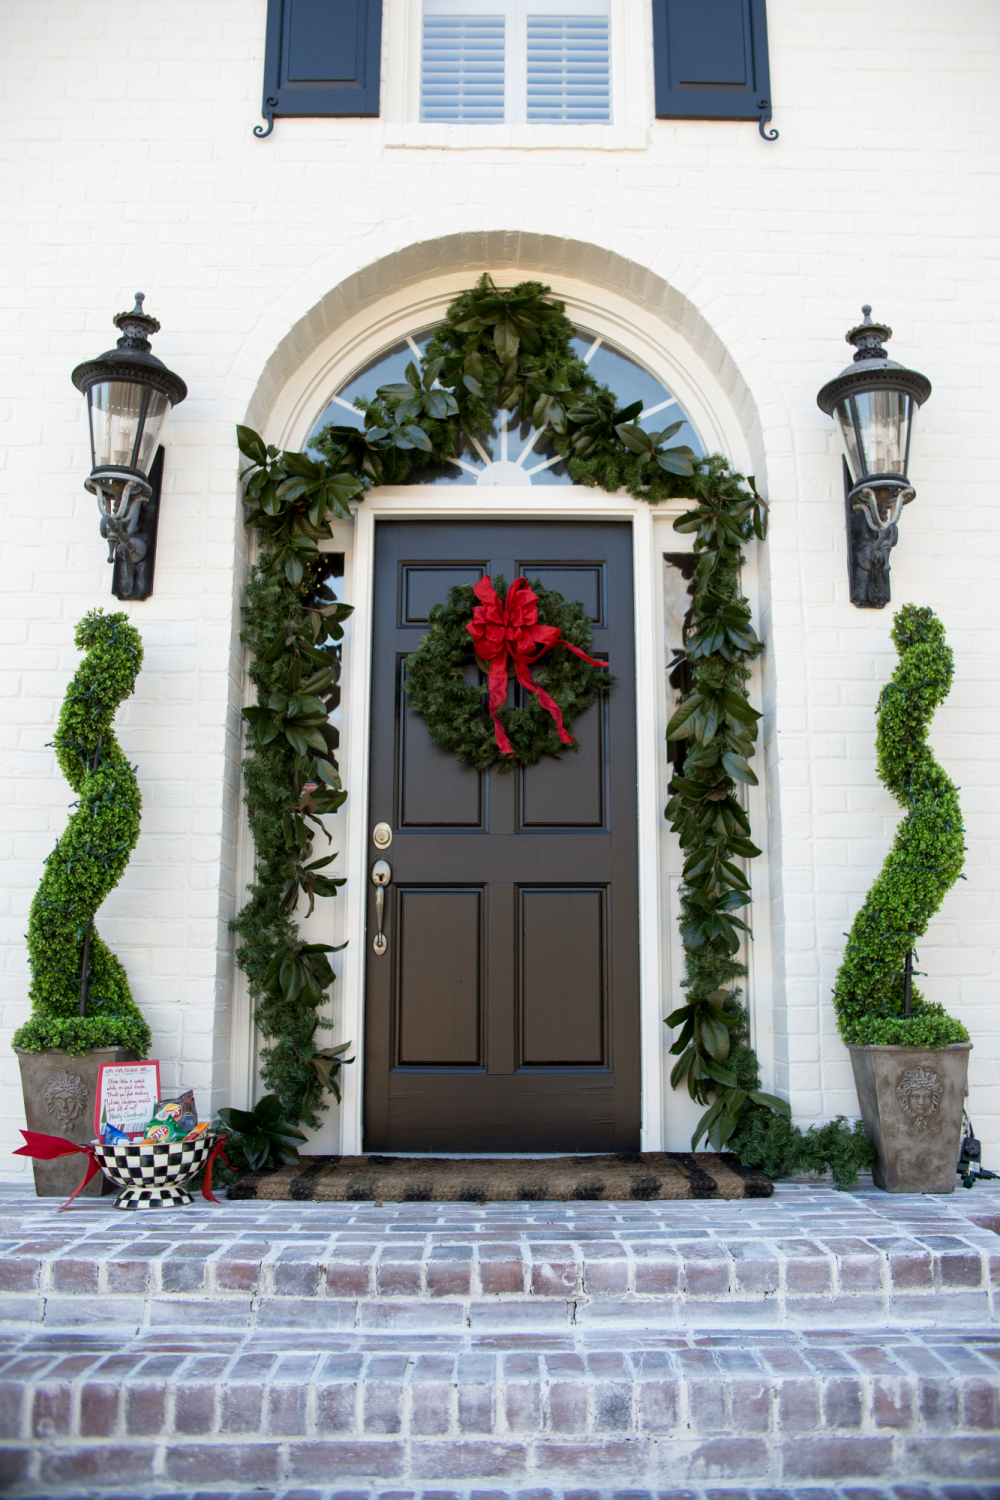
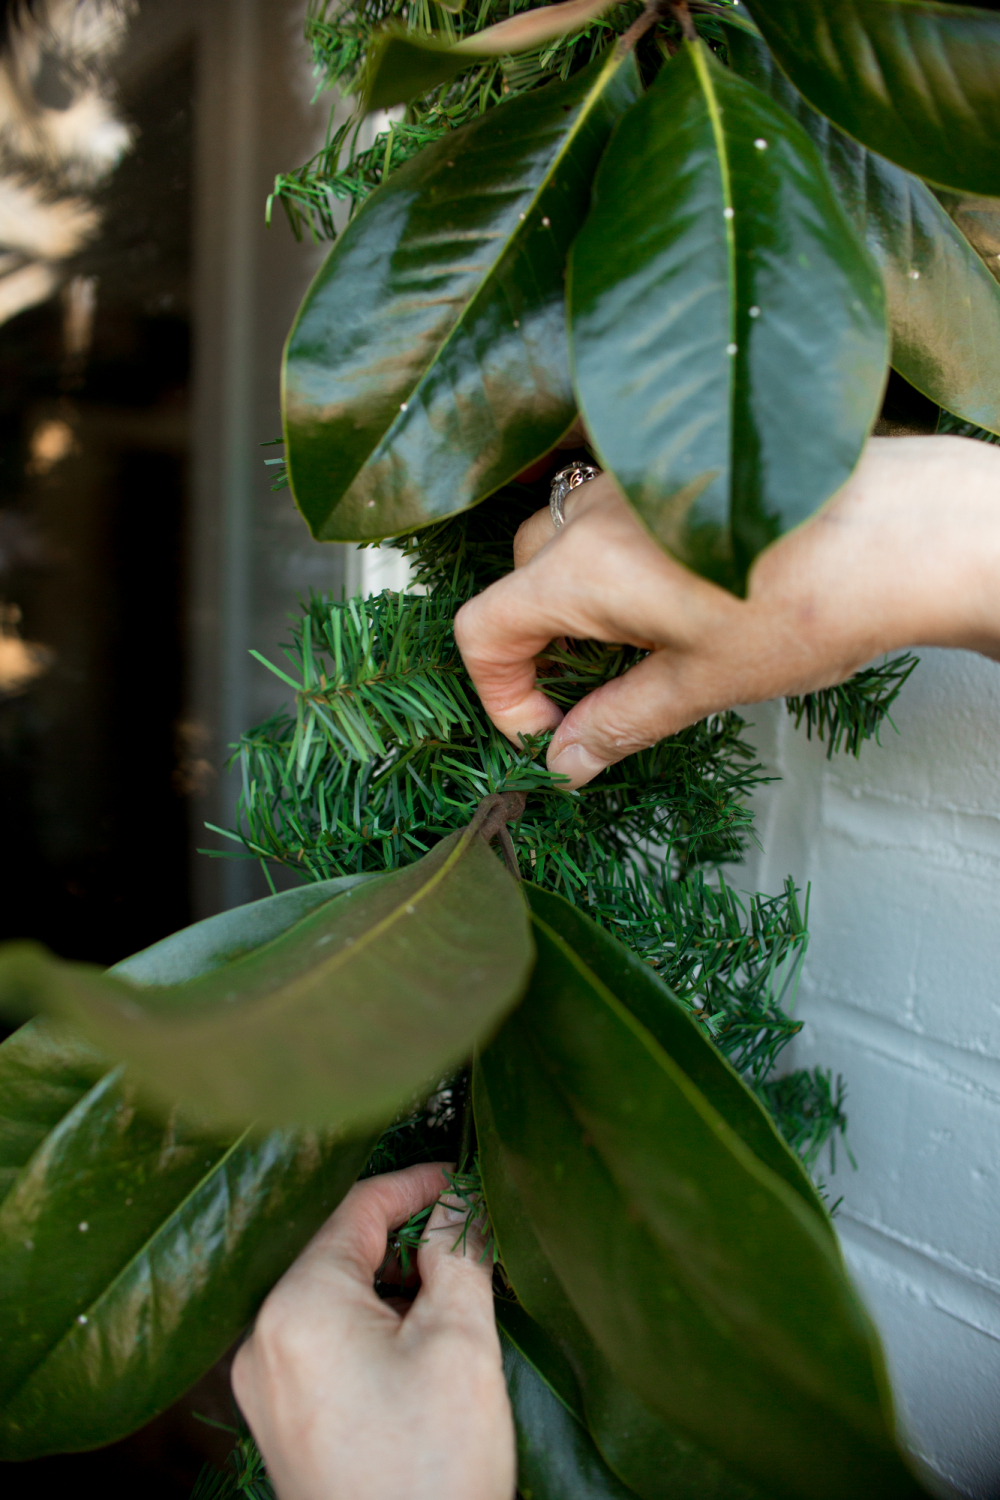
Use the stems to wire the ends of the garland together to get the length you need. Hang your garland wherever you want it (around the door, up the staircase, on the mantle, etc.). After the garland is in place, cut the magnolia branch clusters. When you cut each cluster, try to leave 8 inches to a foot of the limb so you have room to attach it to the garland.
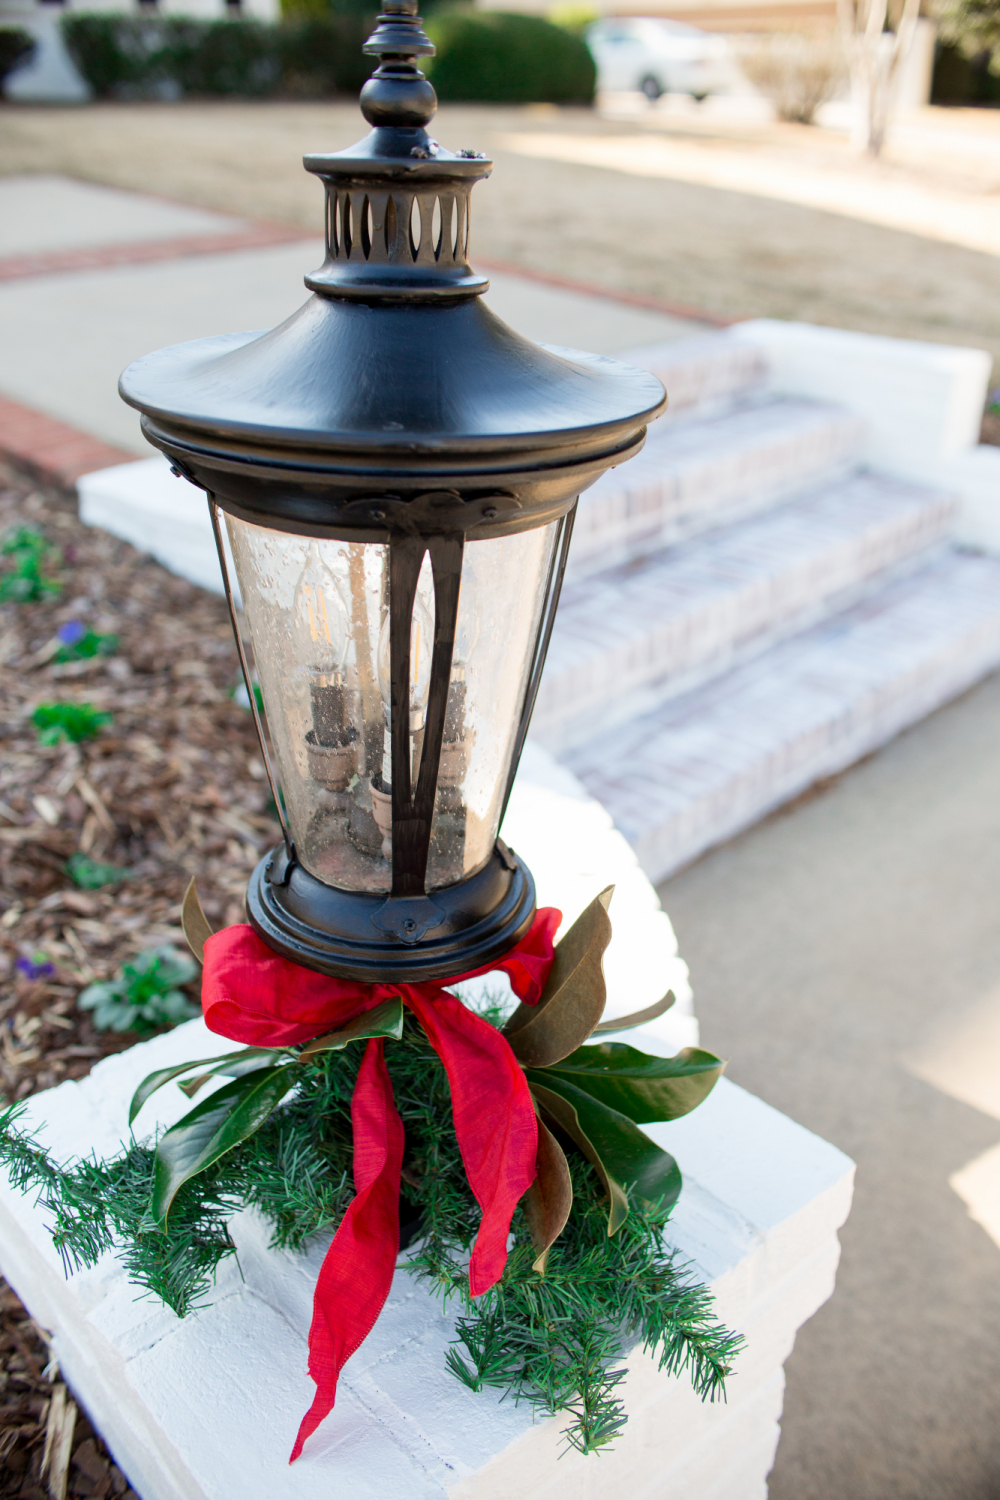
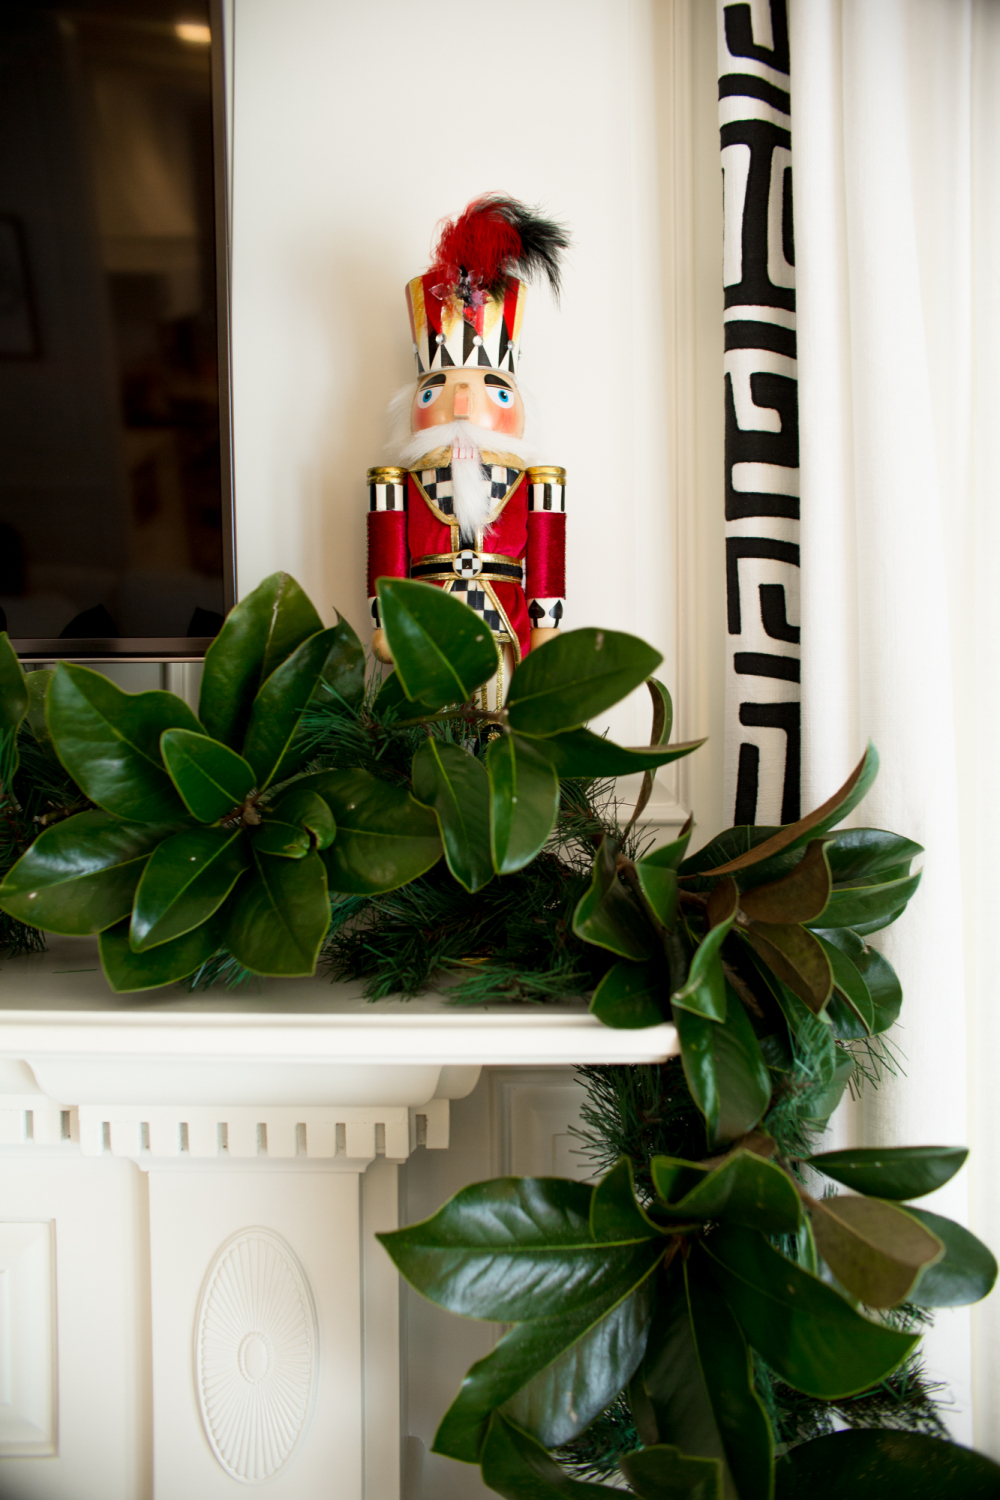
Place each magnolia cluster in the spot where you want and use the garland wire branches to secure the magnolia stem to the garland by twisting the garland wire around the magnolia stem. If you don’t have access to magnolia, you can also use other greenery, like pine or cypress.
Karen says that sometimes Christmas tree lots may have broken branches that they give away or that are priced inexpensively. Or you can use less by just placing fresh greenery in the corners, like she did on the staircase banister.
I hope that helps and y’all let me know if you have questions! Get your Southern magnolia on. Thanks so much for reading – XO –


Oh, I love those stockings!
I love this magnolia garland! I’m going to try it this weekend!!
There’s a serious lack of red in that garland 🙂
HA! I can’t have any more red!!
I love that idea!
How did she attach the garland to the door frame? I have an arched doorway and I can’t figure out how to hang my the garland.
Thanks!
Congratulations on the arrival of your very best present ever, Hudson! Enjoy this time because in a blink they will be graduating high school and flying from the next. My baby girl will be coming to Athens this upcoming fall to join the BullDawg nation 🙂
On to my question…while I love the magnolia garland, I ADORE those stockings!! I can’t tell from the picture, but it looks like you have adorned them with pins maybe from travels, special events, etc… Can you tell us more??
Now that both my girls are older, I am thinking of starting a few new holiday traditions that they can carry on to their “adult” lives. Thinking that starting a new stocking for them to “take – with” might be in order. I don’t think I can part with the ones that have hung on my mantle their entire childhood — sniff, sniff.
As always, thanks for the insight!
Thank you! Yes, it’s a family tradition on my Dad’s side – to have pins on your stockings from travels, experiences, awards, acknowledgements, memories, etc. We’ve done it all my life!
This is sooo adorable and easy! So glad y’all shared it! I can’t wait to try this next year. Love all the Christmas decor. And I’m thoroughly enjoying CBL Christmas playlist on Spotify. It’s spot on!!!
Aren’t parents life savers?! I am so glad to hear that your parents were able to help you decorate and do other little things around the house. It’s such a huge help especially with a newborn. I love how your decorations turned out and your flocked tree just looks so grand. Thanks for sharing this DIY garland and I can’t wait to try!
Maureen | http://www.littlemisscasual.com
We did Karen’s marbled ornament technique with the water and spray paint with my son’s 5th grade class today as we had to make homemade ornaments for his teacher’s classroom Christmas tree and it was a big hit! Thanks to your saved IG post with the instructions. They turned out so pretty and it was a relatively simple and not very messy process even with 10 year olds doing the process. Merry Christmas to your family.
This makes me so happy – I love that! I’ll be sure to let Karen know. So glad it was a hit!
LOVE the stockings! I’m stealing this tradition for when my fiance & I start a family. So sweet!